
Modern semi-autos and revolvers are amazing little machines. Quality handguns built by reputable manufacturers are designed to be rugged and reliable. In fact, they've become so dependable it's easy to forget what they really are: precision-built mechanical devices which are forced to operate under less-than-ideal circumstances. Just like any other machine, handguns need proper cleaning and lubrication to keep them running smoothly.
How Often Should I Clean My Handguns?
Everyone in the shooting industry agrees that keeping guns clean is important. However, when people do disagree, it’s usually about how often cleaning is required.
Some shooters treat their guns like professional racecars, paying strict attention to the state of their pistols before and after each shooting event. Others treat their handguns like the family sedan. Why would you wash it, wax it and change the oil each time you go for a drive? The whole point of buying reliable equipment is so you don't have to worry too much about maintenance, right?
For better or for worse, I follow a tiered gun cleaning schedule based on gun usage and purpose. Each gun gets a bath once a year, whether it needs it or not, to ensure it won't rust. Firearms that only come out once in a while get a lubrication check before shooting, and go back into long-term storage scrubbed and polished. Guns I shoot regularly, but casually, like my favorite .22s, get cleaned on an as-needed basis. I know they need it when the buildup of fouling starts to cause malfunctions, or when the lubrication is starting to wear thin.
Defensive handguns have a much stricter cleaning schedule. These are cleaned immediately after shooting, stored clean, carried clean and regularly checked for dirt build up and proper lubrication. Not everyone agrees with this approach, but my thought is this: Self-defense situations are driven and shaped by many factors outside of my control. Why would I willingly sacrifice one factor I can control, namely, keeping my handgun in the best state of maintenance possible?
Getting Started
The best place to start is your owner’s manual. If you don't have a manual, order one or review it online. Handguns almost always require some level of disassembly for cleaning. Be sure to understand the layout of your pistol and the tools and procedures for disassembly and reassembly. This will help you to avoid damaging the gun, launching springs across the room or losing those important little pieces that can fall out and get lost.
Cleaning & Lubricating Your Handguns:
The specifics of what a particular handgun needs for cleaning changes with each make and model. The following information touches on the general steps to follow:
1. Prepare Your Work Area
Work in a well ventilated area that's been prepared for gun cleaning. The chemicals and compounds produced by shooting, as well as those used to clean and lubricate, are toxic and should be handled with care. A quick and easy way to prepare a workbench or table is to cover it with a large plastic trash bag. Cover the bag with a couple of layers of newspaper or a layer of paper towels, and swap out the padding as it becomes soiled. When you're done with the cleaning session, just turn the trash bag inside out to capture the debris, tie it shut and throw it away.
2. Engage Your Safeties
Ensure the gun is unloaded and pointed in a safe direction before you start cleaning and that all ammunition has been removed from the area. We've all heard stories of someone getting hurt while cleaning a gun. Along with safety considerations, solvents and lubricants can damage ammunition resulting in a failure to fire.
Mark Twain quipped, "If you hold a cat by the tail you learn things you cannot learn any other way." Getting a little splash of solvent in the eye is a similarly enlightening experience. As a bore brush moves out of the barrel, it flicks solvent and fouling into the air and toward your face. If it makes sense to cover your workspace, it’s logical to cover yourself as well. Wear safety glasses. A dust mask and protective gloves are also a good idea.
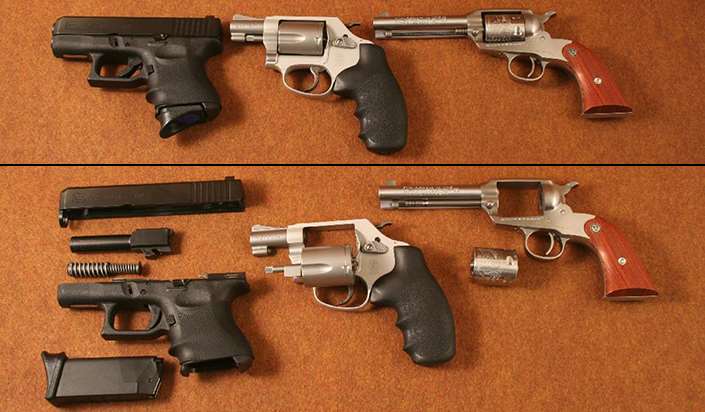
Three types of handguns are shown assembled, and then field stripped for cleaning. Semi-autos are broken down into their major components, double-action revolvers are opened, and single-action revolvers require the cylinder to be removed.
3. Field Strip the Handgun
It's rarely necessary to take a pistol completely apart for anything other than repairs. Field stripping is the process of partially disassembling a pistol for cleaning. For semi-autos, the pistol is broken down to its major components, such as the barrel, slide, guide rod, frame and magazine. Semi-autos have a wide variety of configurations, so be sure to read your manual and understand the field stripping process for your pistol. For single-action revolvers, the cylinder is removed from the frame. For double-action revolvers, simply swing the cylinder out into the open position. All three types of handguns may require you to remove the grip or grip panels as part of the cleaning process.
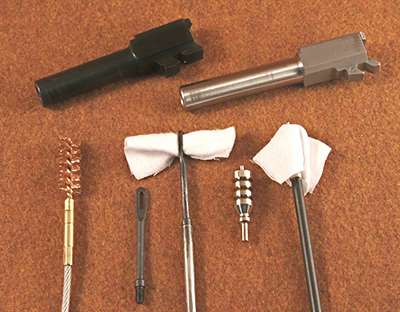
(From the Left) A bore brush, shown attached to a pull cable. Patches are threaded through a patch holder, like the eye of a needle, but patches are wrapped over jags.
4. Clean the Bore of the Barrel:
The interior of the barrel is where most of the action takes place. As such, it's one of the most important areas to clean properly and the most labor intensive. The layer of material left in the barrel after shooting sessions can reduce the pistol's accuracy and corrode the barrel. To begin, attach a bore brush to the cleaning rod. Apply solvent to the brush and push it back and forth through the bore of the barrel several times. It's a good idea to clean and add solvent to the brush once or twice more as you work. Avoid dipping the bore brush directly into the solvent bottle, since this will foul the solvent. Instead, pour solvent onto the brush over a clean container, and then use the solvent in the container to treat patches and rags.
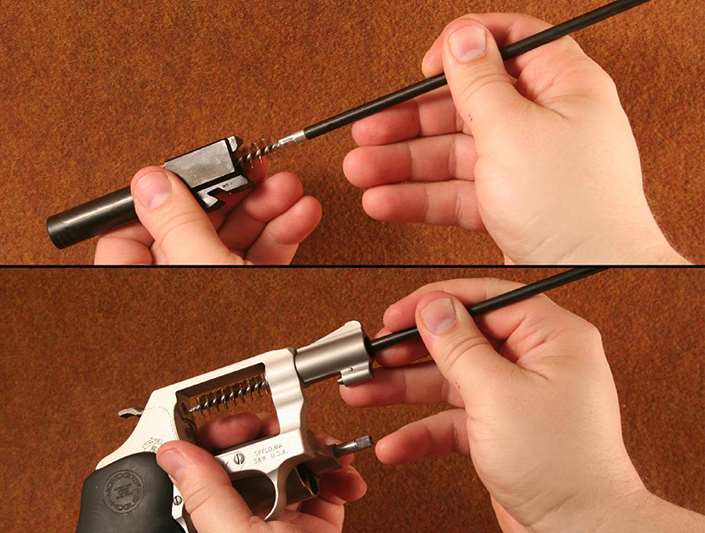
Scrub the bore of the barrel with a bore brush treated with solvent. For semi-autos, scrub from the chamber to the muzzle. For revolvers, scrub from the muzzle to the interior of the frame.
Once the bore of the barrel is thoroughly scrubbed, attach a patch with a patch holder or jag to the cleaning rod and run the patch through the barrel. The first patch will be quite dirty, and will need to be replaced. Run patches through the bore until they start to come out of the barrel looking relatively clean. Use a light to check the barrel bore. If you still see fouling stuck to the interior of the barrel, then run the brush and solvent again, followed by more patches.
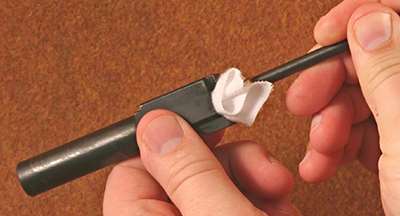
Use patches treated with solvent to finish cleaning the bore after using a bore brush. Use dry patches to wipe the bore clean, then use one patch treated with gun oil to preserve and protect the bore.
Once you have removed all of the visible fouling with the bore brush, then run a patch or two treated with solvent through the barrel to remove any loose particles. Follow this with dry patches until they come out looking clean. Finally, run a clean patch treated with a little gun oil or lubricant through the bore. This thin layer of oil will protect the bore from moisture.
This process is only conducted once for semi-autos, since you only have the barrel to clean. Revolvers, on the other hand, have one long barrel and five or six chambers in the cylinder. Each chamber should be brushed and patched like the barrel.
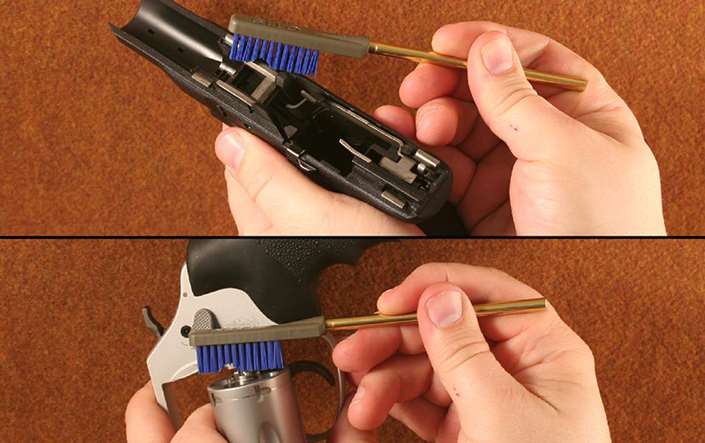
5. Clean the Frame & Other Components:
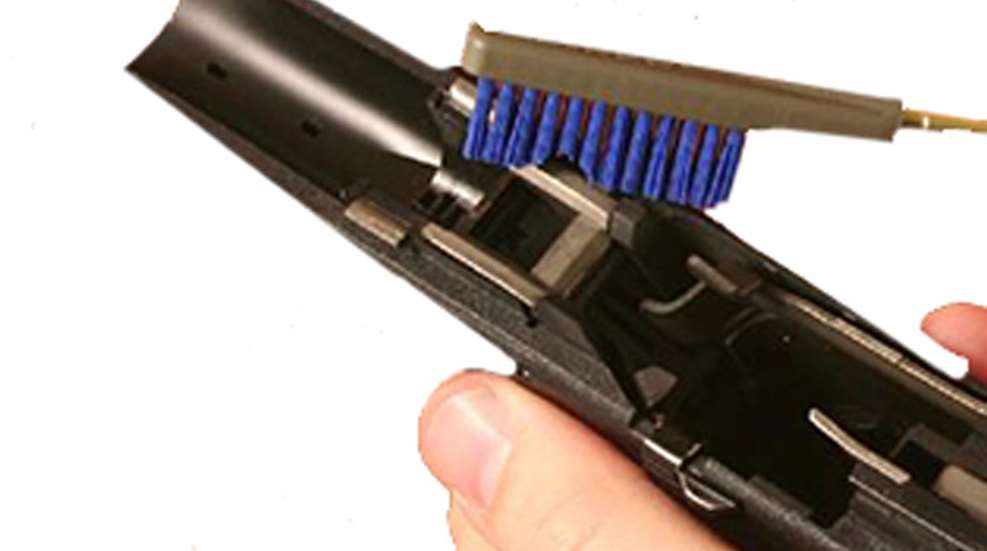
Use your nylon brush, with some solvent, to scrub the other parts of the gun, and then use a rag to wipe off the solvent and residue. Be thorough in your inspection of the pistol. If something looks dirty, it is. Check the nooks and crannies for a buildup of fouling. For semi-autos, pay close attention to cleaning the slide's interior grooves, under the ejector and the contact points between the slide and the frame. For revolvers, keep an eye out for build up around the forcing cone, the face of the cylinder and the cylinder ratchet. For double-action revolvers, don't forget to check under the ejector star as well.
It's not necessary to get the gun dripping wet with solvent. A little goes a long way. How much cleaning attention is needed, and where it should be directed, depends on the gun and how much it has been shot. Just like your work with the patches, if you rub an area with a clean cloth or swab and it comes away smudged, more cleaning is required. Wipe the pistol clean of all solvents before lubricating.
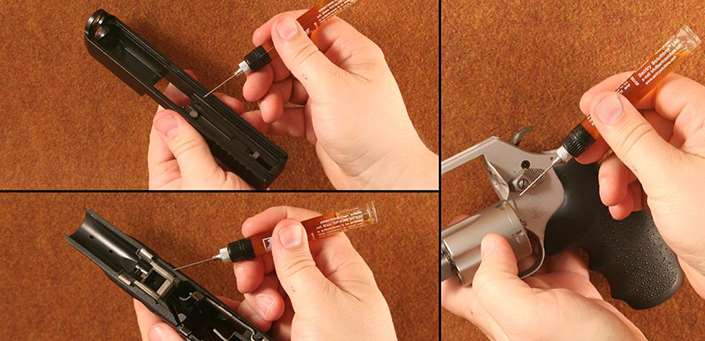
Follow the instructions in your owner’s manual for adding small amounts of lubricant to the proper points on your firearm.
6. Lubricate The Handgun:
The lubrication points differ from pistol to pistol. In general, semi-autos need lubricant where the various parts rub against each other as the action cycles. Revolvers need only a little lubrication. Single-actions need some on the cylinder pin and ratchet, while double-actions need some on the ejector rod and cylinder ratchet. The key is not to over lubricate. Too much will only serve to attract and hold gun fouling.
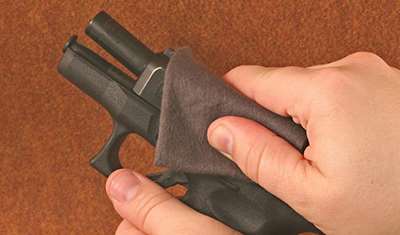
When cleaning and lubrication are complete, assemble the handgun and wipe it down with a clean cloth or rag to remove any excess lubricant. Use a finishing cloth (shown here) or a cloth treated with a little gun oil to wipe down the exterior of the pistol one more time to protect it from moisture and corrosion.
7. Finishing Up:
Now it’s time to reassemble the pistol. Once it’s all back together, cycle the action a few times to spread the lubricant evenly and to make sure everything is working correctly. If any lubricant oozes out of joints, wipe it off with a rag.
To preserve and protect the exterior finish of the gun, it needs a light coating of preservative. This is especially true of guns with a blued finish. Apply a little gun oil or metal preservative to a clean rag and wipe down the outer surfaces of the pistol. You can also purchase pre-treated cloths for this purpose. Think of it as giving your car a quick coat of wax before parking it in the garage. Place the pistol in its designated locking container, clean up the work area, and then wash up with soap and cool water.
Handgun Cleaning Products
The market currently supports an astounding array of popular and reliable gun cleaning products. The step-by-step overview described here reflects the process of cleaning a handgun using a simple kit. But simple kits are just one of the choices available. Whichever products you choose, be sure keep your guns properly cleaned. Remember, if you take care of your equipment, it will take care of you.